



10 Trellis Planter Ideas to Build This Weekend for Small UK Gardens
Posted by Amy Hall on 9th Sep 2026
10 Trellis Planter Ideas to Build This Weekend for Small UK Gardens
For most small gardens and balconies, a moveable raised planter with a lattice or removable trellis gives you the best balance of mobility, root depth and vertical growing space. Larger plots suit a built-in planter with a fixed lattice back for screening, while an obelisk or teepee planter suits anyone who wants height without bulk. The right choice depends on how much you need to move it and what you’re growing, and every idea below comes with build notes, fixing tips and planting suggestions.
TL;DR:
- A moveable resin planter with a lattice panel is ideal for balconies and rental gardens, offering mobility with low difficulty.
- Reinforcing fixings with stainless or galvanized screws and adding ballast are essential for stability, especially for taller planters subject to wind.
- Select climbers like clematis, runner beans, or climbing roses based on soil depth, support needs, and desired flowering or fruiting outcomes.
- Applying an exterior-grade stain and ensuring proper drainage extend the lifespan of timber planters exposed to outdoor weather.
- Building a simple, sealed, and properly weighted planter typically outlasts more decorative designs that neglect finish and anchoring details.
Table of Contents
- 10 planters with trellis ideas to copy this weekend
- How to build a raised planter with trellis in a weekend
- How do you attach a trellis to a planter safely?
- What climbers and edibles suit a planter trellis?
- Weatherproofing a trellis planter for a changeable climate
- Weight, anchoring and safety for tall trellis planters
- Pruning and care for climbers on a trellis
- Seasonal care for your planter and trellis
- Common problems and pests on trellis climbers
- Why simple designs usually outlast clever ones
- How Great Gardens Online can help with your build
- Where to find full plans and video tutorials
- Where to buy the parts for your build
- Sources
10 planters with trellis ideas to copy this weekend
Trellis planters earn their keep by turning wasted vertical space into growing space, and they double as privacy screens when you need to hide a bin store or a neighbour’s fence panel. Here are ten approaches worth trying, ranked roughly from simplest to most involved.
- Moveable container and trellis: best for balconies and rented gardens; use a lightweight resin pot with a slot-in lattice panel; low difficulty; try trailing nasturtium.
- Built-in raised planter with lattice back: best for privacy screening; needs scaffold boards or cedar and a fixed lattice panel; moderate difficulty; suits clematis.
- Obelisk or pyramid planter: best for a single statement feature; softwood battens plus a terracotta or timber pot; moderate difficulty; ideal for sweet peas.
- Arched planter walkway: best for a garden entrance; two planters linked by an arched frame; higher difficulty; suits climbing roses.
- Espalier planter for fruit: best for growing food against a sunny wall; a deep planter with horizontal wire supports; moderate difficulty; try a trained apple or pear.
- Reclaimed window-frame trellis: best for a characterful, low-cost look; an old window frame fixed above a planter box; low difficulty; suits ivy or clematis.
- Netting trellis for vegetables: best for a productive kitchen garden; a simple timber frame strung with plastic or jute netting; low difficulty; suits runner beans.
- Cedar lattice planter: best for a polished, long-lasting build; cedar boards with a pre-cut lattice panel; moderate difficulty; suits climbing hydrangea.
- Scrap-wood budget planter: best for a first DIY project on a tight budget; reclaimed pallet wood and offcut battens; low difficulty; try pole beans.
- Modern pipe and cable trellis: best for a contemporary courtyard look; metal pipe uprights with tensioned cable, built as a movable design that can follow the sun; higher difficulty; suits Boston ivy.
If you’re short on tools, buying a pre-cut lattice panel and screwing it to an existing planter is the fastest route to a finished look. It sidesteps the trickiest part of the whole job: cutting clean, evenly spaced slats.
How to build a raised planter with trellis in a weekend
A raised planter with an attached trellis is a genuinely achievable two-day project, even for someone who has never built anything from timber before. Here’s the full tools and materials list, followed by the step sequence.
Tools: circular saw or handsaw, drill driver, spirit level, tape measure, spacers or scrap wood for even gaps, and a paintbrush for the finish.
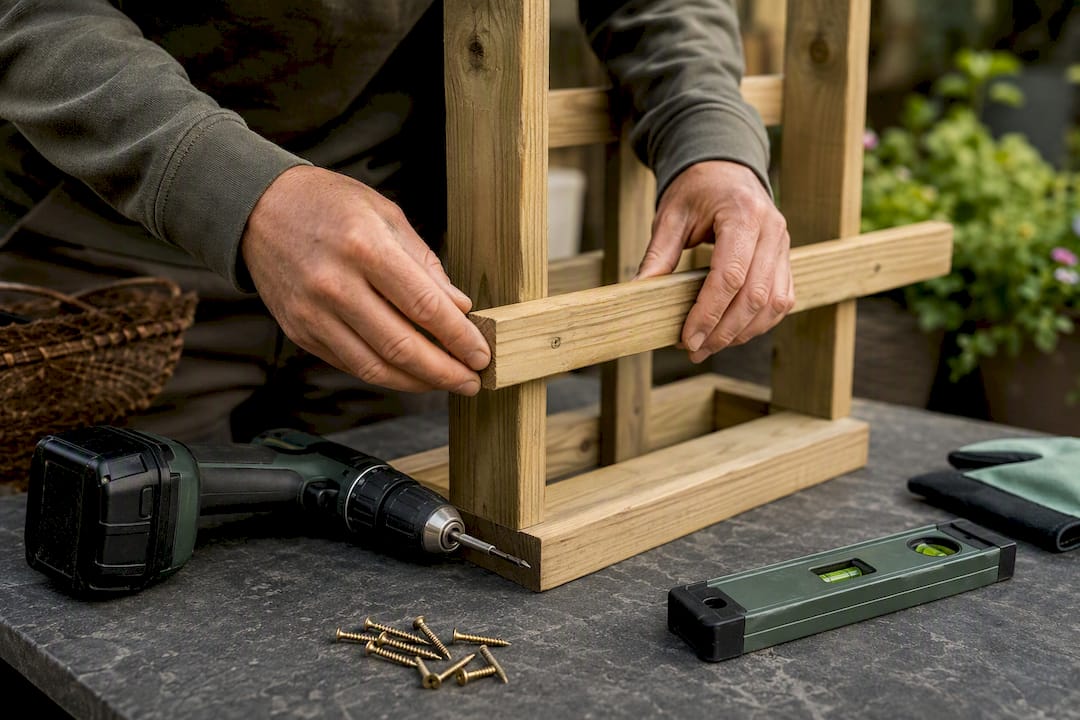
Materials: cedar or pressure-treated softwood boards for the box, a pre-cut lattice panel (or battens if you’re making your own), exterior wood screws, landscape fabric, exterior-grade sealant or stain, and galvanised corner brackets.
Cost estimate: budget builds using fence pickets and standard lattice panels have come in as low as £40 to £60 in comparable US tutorials, and UK material prices sit in a similar range once you swap cedar fence pickets for scaffold boards or budget softwood. Cedar costs more upfront but needs less frequent maintenance.
- Cut your box panels and trellis uprights to size, checking every measurement twice before you cut.
- Assemble the planter box using exterior screws and corner brackets, checking it’s square as you go.
- Fit landscape fabric inside the box and drill drainage holes in the base.
- Build the trellis frame separately, spacing slats evenly with scrap wood spacers.
- Fix the lattice to the frame, then attach the whole trellis to the back of the planter box.
- Seal all exposed end grain and apply your chosen exterior finish before planting up.
Pro Tip: Pre-drill every screw hole in thin lattice slats. Skipping this step is the single most common reason DIY trellis panels split down the grain.
If you’re growing vegetables, avoid pressure-treated timber anywhere the roots will touch the wood; keep it for the outer box frame only, or choose naturally rot-resistant cedar instead.
How do you attach a trellis to a planter safely?
Wind, not weather, causes most trellis planter failures. A tall lattice acts like a sail, and if the fixings are weak or the base is too light, the whole thing goes over in the first proper gust.
- Drive structural wood screws through the planter frame into the trellis uprights, or reinforce joins with galvanised L-brackets.
- For planters standing against masonry or rendered walls, fix with 4 inch concrete-rated screws or suitable wall anchors.
- For portable planters, add internal ballast such as grit, gravel or sand bags, and use levelling feet or bolt-down plates rather than casters wherever the trellis is tall.
- Casters work fine on shorter, lightweight trellis designs, but they need locking wheels or extra ballast the moment the structure gains height.
- Choose stainless or galvanised fixings throughout; standard steel screws corrode fast in a wet climate and weaken the whole joint.
What climbers and edibles suit a planter trellis?
Choose your climber to match the job the trellis is doing, whether that’s colour, privacy or food. Clematis, nasturtium, pole beans and Boston ivy are all reliable performers in a planter, and each suits a slightly different situation.
- Clematis: one plant per planter, needs a deep root run of at least 45cm, prefers “cool feet, warm head” so shade the base and let the top climb into sun.
- Sweet peas or nasturtium: two to three plants per average planter box, full sun, pinch out tips early to encourage bushier growth.
- Runner or pole beans: two to four plants spaced 20cm apart, need at least 30cm of soil depth, full sun, and regular water once flowering starts.
- Cucumbers: one to two plants per planter, minimum 30cm soil depth, train up the trellis weekly rather than letting them sprawl.
- Climbing roses or espalier fruit: one plant per planter, need the deepest soil (50cm plus) and a sturdy, well-anchored frame.
Train young growth onto the trellis every week or two through the growing season; left unguided, most climbers will flop sideways rather than head upwards.
Weatherproofing a trellis planter for a changeable climate
Finish quality decides how long your build lasts far more than the joinery does. A good exterior-grade finish is the single most critical step for any outdoor timber structure exposed to repeated wetting and drying.
- Use an exterior-grade stain or paint on the whole structure, and seal every cut end grain edge, since that’s where water gets in fastest.
- Line the planter with landscape fabric, drill generous drainage holes, and lift the whole box off the ground on battens or feet so the base timber never sits in standing water.
- Choose cedar or another rot-resistant species for anything in prolonged ground or soil contact.
- Re-seal the finish every two to four years, check every fastening for rust or looseness once a year, and replace individual lattice slats rather than the whole panel when they crack.
Pro Tip: Check fixings each spring before growth hides them. A loose bracket is far easier to tighten in March than to find in August, buried under three months of clematis.
Weight, anchoring and safety for tall trellis planters
Height changes everything. A trellis planter under a metre tall behaves like ordinary garden furniture, but anything taller starts acting like a sail once foliage fills it in, and a top-heavy planter with a shallow base is genuinely unstable in a storm.
The fix is to build weight and anchoring in from the start rather than adding it as an afterthought. Internal corner blocks strengthen the joints between box and frame, while ballast and levelling feet keep the whole structure planted even as the plant above gets heavier through the season. Sand bags or a layer of gravel in the base of the planter add low, stable weight exactly where you need it, rather than up near the trellis top where it would do nothing to stop tipping.
If the planter needs to move occasionally, bolt-down plates that release with a spanner are safer than permanent casters, which tend to invite exactly the kind of accidental nudge that topples a loaded trellis. Position tall planters away from main foot traffic and away from fence lines that funnel wind, and check the whole assembly for wobble after any named storm, not just once a year. A planter that’s rock solid in June can work its screws loose after a windy autumn, so a quick shake test each season catches problems while they’re still a five-minute fix.
Pruning and care for climbers on a trellis
Training beats pruning for the first year. Tie in new growth loosely with soft garden twine every couple of weeks through spring and summer, guiding stems onto the lattice rather than letting them find their own way, which usually means sideways rather than up.
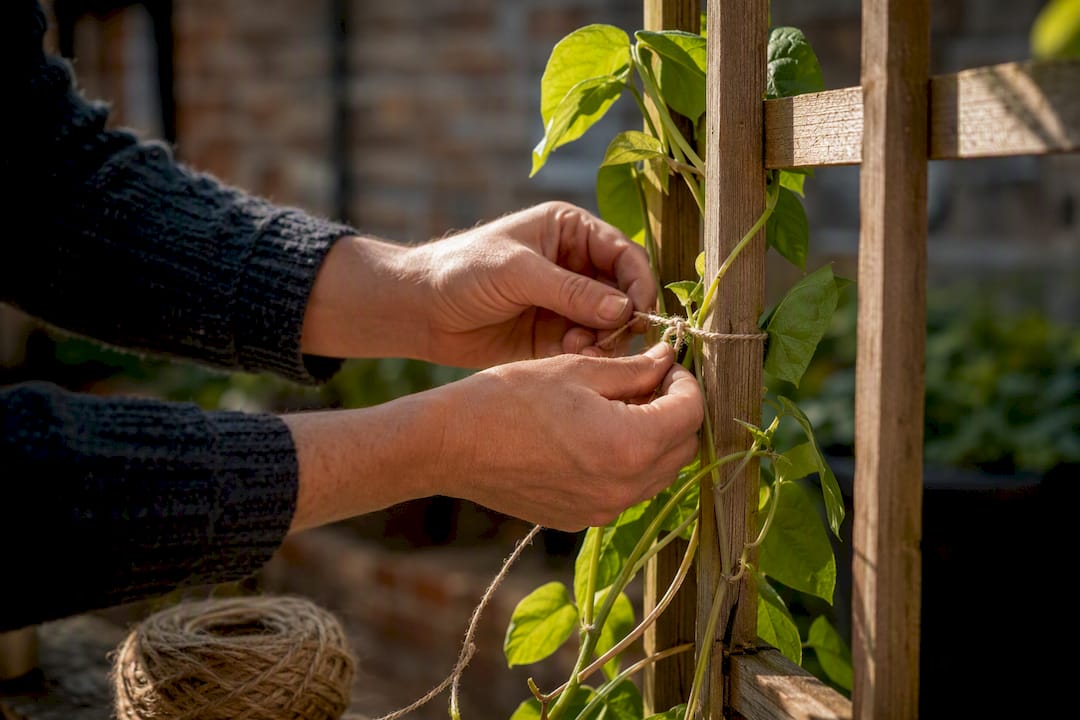
Once a climber is established, pruning timing depends entirely on the species. Summer-flowering clematis wants a hard cut back in early spring, down to around 30cm, while spring-flowering types need only a light tidy straight after flowering finishes. Climbing roses get their main prune in late winter, removing dead or crossing stems and tying the strongest canes horizontally along the trellis, since horizontal training produces far more flowering side shoots than letting canes run straight up.
Edibles need lighter but more frequent attention. Pinch out the growing tips of runner beans once they reach the top of the trellis to encourage side shoots, and remove any yellowing lower leaves on cucumbers to keep air moving through the foliage. Deadhead sweet peas every few days through summer, because a plant left to set seed stops producing new flowers within a fortnight.
Feed trellis-grown climbers more generously than you’d feed the same plant in open ground. A planter’s compost depletes faster than garden soil, so a fortnightly liquid feed through the growing season keeps growth steady rather than patchy.
Seasonal care for your planter and trellis
Spring is when most of the real work happens. Refresh the top few centimetres of compost, check every fixing on the trellis frame after winter winds, and start training new growth onto the lattice as soon as it appears rather than waiting until it’s already sprawling sideways.
Summer is about steady maintenance: watering more often than you’d expect, since planters dry out far faster than open beds, plus regular tying-in and deadheading to keep flowering climbers productive. Feed edibles through this period to keep pace with the compost’s limited nutrient reserve.
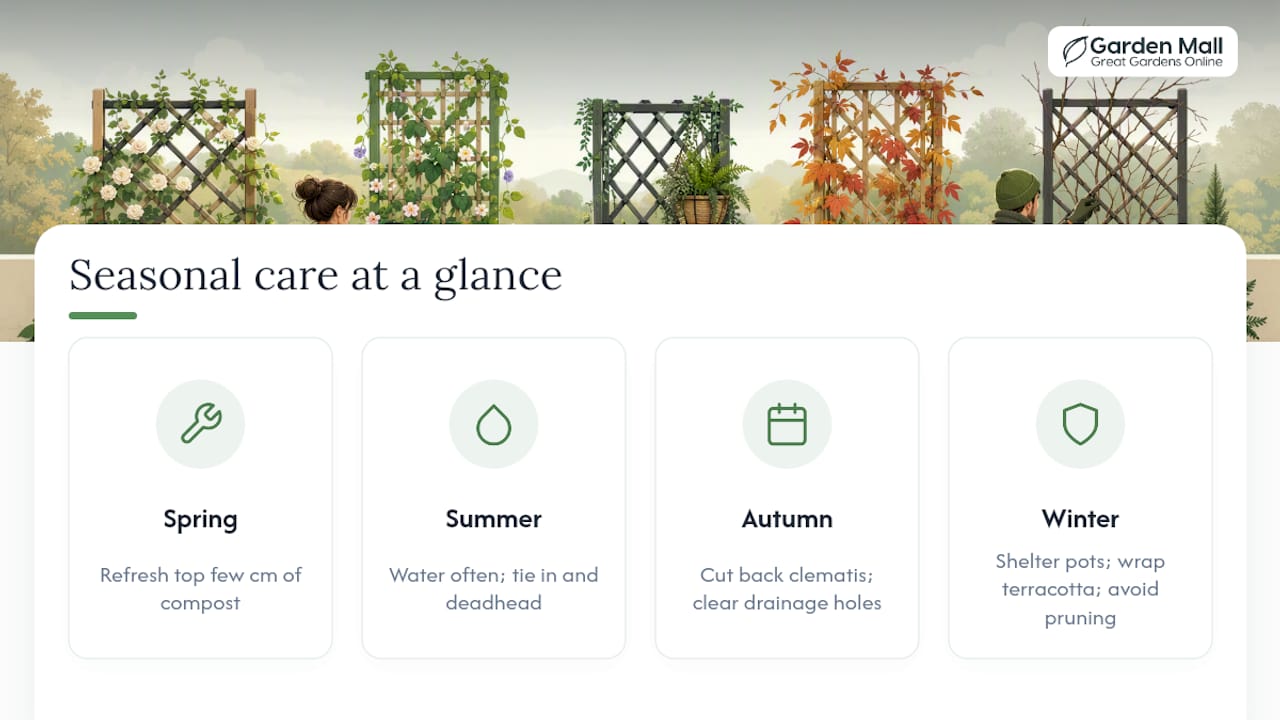
Autumn calls for a proper inspection before winter sets in. Cut back summer-flowering clematis, lift any tender climbers that won’t survive frost, and check the planter’s drainage holes haven’t clogged with fallen leaves, which can leave the base waterlogged all winter.
Winter is largely about protection. Move portable planters somewhere sheltered from the worst wind if you can, wrap terracotta pots prone to frost damage, and resist the urge to prune anything that isn’t clearly dead, since a hard winter cut on the wrong species can remove next year’s flowering wood entirely.
Common problems and pests on trellis climbers
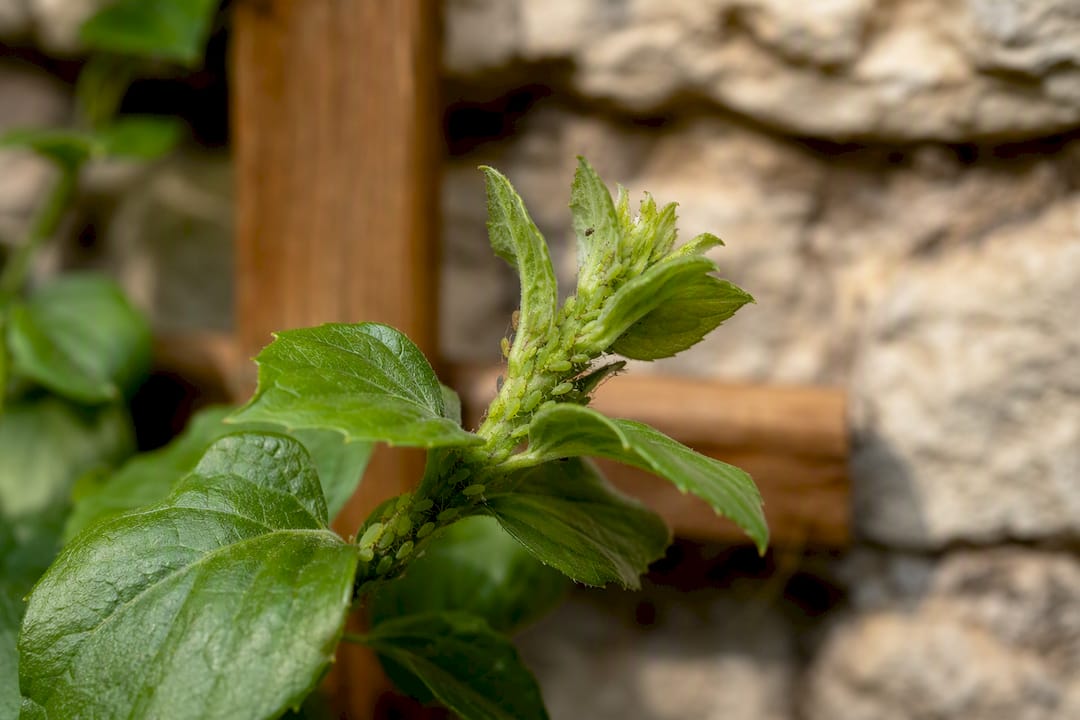
Aphids are the most frequent visitor, clustering on soft new growth near the top of the trellis where airflow is often weakest. A strong jet of water or an insecticidal soap spray usually clears a light infestation before it spreads.
Powdery mildew shows up as a white, dusty coating on leaves, particularly on courgettes and cucumbers grown up a trellis in a sheltered, still corner. Better airflow around the frame helps prevent it, so avoid packing plants in too tightly even when the planter looks bare at planting time.
Slugs and snails target young seedlings before they’ve even reached the lower rungs of the trellis, so protect new plants with a barrier or trap in the first few weeks rather than waiting for damage to appear. Blackspot on climbing roses and blight on beans both spread fastest in wet, still conditions, which makes good spacing and a well-drained planter your best defence against most fungal problems in one move.
Yellowing lower leaves often mean the planter itself has a drainage issue rather than a pest or disease. Check that drainage holes haven’t blocked before reaching for a spray.
Why simple designs usually outlast clever ones
Most trellis planter failures come down to two things: skipping the finish and skimping on the anchoring. Neither mistake shows up on day one. A planter with an unsealed cut edge looks perfectly fine for its first summer, and a lattice screwed on without corner blocks stands solidly right up until the first proper autumn gale finds the weak joint.
The pattern worth noticing is that the most durable builds are usually the plainest ones. A straightforward box with a bolted-on lattice panel, properly sealed and properly weighted, will outlast a far more decorative obelisk that’s had its finishing corners cut. Complexity is not where these projects go wrong. Neglecting the boring half hour of pre-drilling, sealing and checking fixings is where they go wrong.
There’s also a case for building smaller and more modestly than Pinterest inspiration suggests. An arched planter walkway looks spectacular in photographs, but it demands more joinery, more anchoring and more long-term upkeep than most gardens actually need. A single well-built raised planter with a lattice back solves the privacy problem, holds a decent depth of soil for root growth, and takes a weekend rather than a fortnight. Start there, and add height or drama once you’ve proved to yourself the basic structure holds up through a winter.
— Peter
How Great Gardens Online can help with your build
Great Gardens Online stocks planters, pre-cut lattice panels, exterior stains and the fixings you’ll need, so you’re not tracking down every component separately. Buying a ready-cut lattice panel is the quickest way to skip the trickiest part of the build. The range carries strong ratings on Trustpilot from other gardeners who’ve built similar projects.

Where to find full plans and video tutorials
For readers who want more detail than a single article can hold, HGTV’s built-in trellis planter plan covers a movable, cable-supported design. Popular Mechanics offers a visual walkthrough of a privacy-focused build. Real Homes sets out a full materials list with fixing detail. Jen Woodhouse provides a beginner-friendly weekend plan with cost notes, and SawStop’s project plan and video suit anyone ready to attempt more decorative joinery.
Where to buy the parts for your build
Skip the trip round three different shops and get your planter, lattice panel, exterior stain and fixings from one place. Great Gardens Online carries a full range built for exactly this kind of weekend project.
If you’re planning a wider patio makeover alongside your new trellis planter, it’s worth reading up on improving patio comfort too, since shade and shelter make a real difference to how much you actually use the space once it’s planted up. For the planter itself, browse the planters and garden structures range at Great Gardens Online, pick your box and lattice panel together, and get your build started this weekend rather than next month.
