


Wait 40–60 Minutes: Fire Pit Cooking for UK Gardens, 4 Recipes
Posted by Amy Hall on 13th Sep 2026
Wait 40–60 Minutes: Fire Pit Cooking for UK Gardens, 4 Recipes
Yes, you can cook properly on a fire pit, and once you get the coal bed right, it beats a gas barbecue for flavour. Success comes down to three things: patience while the wood burns down to glowing coals, a sturdy grate or tripod positioned at the right height, and a few long-handled tools to keep your hands well away from the heat. Get those three right and everything else, from searing steak to simmering a stew, follows naturally.
TL;DR:
- Achieving steady, glowing coals takes 40 to 60 minutes, which ensures consistent heat for cooking without unpredictable flames.
- Bowl-style fire pits generally accept standard grates or tripods and are most versatile for various fire-pit cooking methods.
- Keeping a grate height of 4 to 6 inches above the coals is critical for controlling temperature and avoiding scorching your food.
- Proper tools such as heavy-duty gloves, long-handled tongs, and cast-iron cookware are essential for safety and effective cooking.
- Using a mature coal bed rather than active flames provides more even heat for searing, roasting, and simmering dishes.
Table of Contents
- Choosing and preparing your fire pit for cooking
- Core fire-pit cooking methods and heat management
- Fire pit recipes worth cooking again
- Safety, site selection and maintenance
- Why Great Gardens Online backs simple, sturdy fire-pit kit
- What most fire pit cooking advice gets wrong
- Get your fire-pit cooking starter kit sorted
- Sources
- FAQ
Choosing and preparing your fire pit for cooking
Not every fire pit is built the same way, and the shape you own shapes what you can cook. Bowl-style pits are the most versatile for home cooks, since most accept a flat grate or a tripod without any modification. In-ground fire rings give you a wider, deeper coal bed, which suits Dutch oven work and slow roasting more than quick searing. Raised steel pits heat up fast and cool down fast too, so they reward direct grilling but need closer attention during longer cooks.
Whichever style you have, grate height decides your cooking temperature more than anything else. Positioning food roughly 4 to 6 inches above the coals gives you a hot direct zone for searing, while shifting a rack further away, or moving the coals to one side, creates a cooler indirect zone for roasting.
Before you light anything, gather your kit:
- An adjustable grate or tripod rack that sits securely on the pit’s rim
- A cast-iron skillet and a Dutch oven with a well-fitting lid
- Long-handled tongs and a spatula, ideally 45cm or longer
- Heavy-duty, welding-grade gloves rather than standard oven mitts
- A coal rake or poker to redistribute embers
Set the pit on a solid, non-combustible base, clear a generous perimeter of anything flammable, and give your grate a wobble test before you trust it with a hot pan.
Core fire-pit cooking methods and heat management
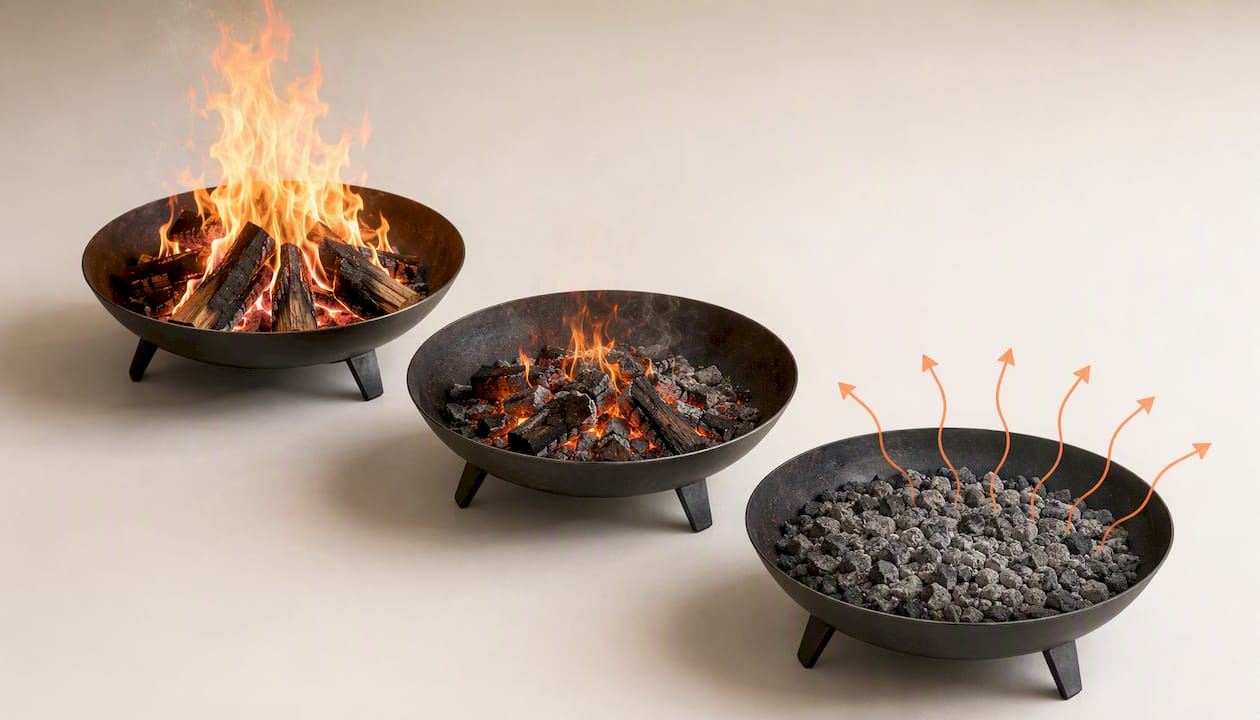
Most fire-pit disasters come from cooking over flame instead of coals. Flames are unpredictable and scorch food before the middle cooks through. A mature coal bed glows steadily, radiates even heat, and gives you far more control.
- Direct grilling. Rake coals into a dense pile directly beneath the grate for steaks, burgers, sausages and vegetables that cook quickly and benefit from a hard sear.
- Indirect roasting. Push coals to one side or lower the food further from the heat to slow-cook joints of meat, whole fish or anything that needs gentle, even warmth without charring.
- Dutch oven cooking. Nestle a bed of coals underneath the pot and pile a handful on the lid too, since heat from above matters as much as heat from below for stews, bread and casseroles.
- Ember and foil-packet cooking. Wrap food tightly in a double layer of foil, bury the parcel in embers at the pit’s edge, and retrieve it with tongs rather than bare hands.
Judging temperature without a dial takes a little practice. A common trick is holding your palm at grate height and counting how many seconds you can comfortably keep it there. A hand-test count of just two or three seconds signals searing heat; five or six suggests a gentler roasting zone. Treat it as a rough guide rather than a precise thermometer.
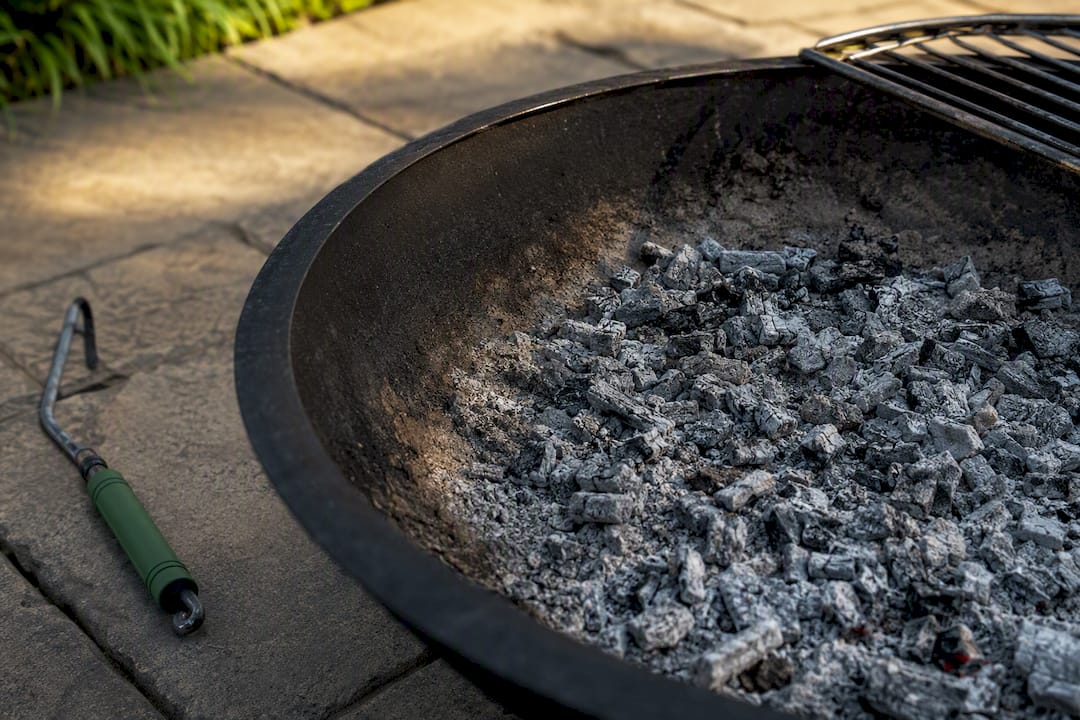
Pro Tip: Let your fire burn for 40 to 60 minutes before you put anything on the grate. Coals that have lost their orange flare and settled into a steady grey glow give you far more consistent results than a fire still throwing flames.
Fire pit recipes worth cooking again
Once the coal bed is ready, these four dishes cover most of what fire pit cooking does well, and each one has appeared in various forms across recipe roundups built specifically for backyard fires.
- Seared steak or kebabs: Sear over the hottest direct zone for two to three minutes a side, then rest for five minutes off the heat before slicing. Skewered vegetables and halloumi work the same way and cook faster.
- Dutch oven beef stew or chilli: Build a base of eight to ten coals under the pot, add browned meat and vegetables, then top the lid with a similar number of coals and let it simmer undisturbed for an hour or more.
- Foil-packet salmon or root vegetables: Wrap fillets or chopped vegetables with butter, lemon and herbs, bury the parcel in embers, and check after 15 to 20 minutes.
- Campfire banana or foil-baked apple crumble: Split a banana lengthways, stuff with chocolate and marshmallow, wrap in foil, and rest it at the embers’ edge for around ten minutes.
Cook proteins first while your coal bed is at its hottest, then move vegetables and sides to the cooler zone while the meat rests. A rested steak or a finished stew both hold their heat well away from direct coals, so you rarely need to keep anything cooking longer than the recipe demands.
Safety, site selection and maintenance
A fire pit rewards good habits and punishes sloppy ones, so a little discipline before you cook pays off. Choose a spot on paving, gravel or bare earth rather than decking or dry grass, and keep a clear perimeter well away from fences, overhanging branches and garden furniture.
- Keep an ABC-rated extinguisher or a full bucket of water within arm’s reach whenever the fire is lit, in line with Essex County fire safety guidance
- Use a spark guard on windy evenings and keep a basic first-aid kit nearby
- Burn seasoned hardwood such as oak, maple or fruitwood, or use charcoal for steadier heat; avoid softwoods like pine and never burn treated or painted timber
- Let ash cool fully before disposal, wipe down grates while they’re still warm, and oil cast-iron cookware once it has cooled to stop rust taking hold
Seating layout matters for safety too, and sensible clearances around a fire pit make it far easier to keep children and pets at a safe distance without cramping your cooking space.
Why Great Gardens Online backs simple, sturdy fire-pit kit
Cooking over live fire strips away the fussiness of gas barbecues, and the gear that works best is refreshingly simple: a solid grate, cast-iron that holds heat evenly, and gloves rated for genuine radiant warmth rather than kitchen oven mitts. A broad range of outdoor cooking and heating products is available, with options for next-day delivery and customer service support.
A grate that sits flush without wobbling, a Dutch oven that has seen a few fires, and gloves that actually protect your wrists. That is most of what fire-pit cooking needs.
If you’re building a starter kit, look at adjustable grates, cast-iron skillets and heavy-duty gloves as your first three purchases.
What most fire pit cooking advice gets wrong
Most guides fixate on recipes before they explain heat, which is exactly backwards. The technique that actually separates a good fire-pit cook from a frustrated one is patience with the coal bed, not knowledge of a particular dish. Rush that stage and every recipe afterwards fights against unpredictable flame instead of steady radiant heat.
The conventional advice on grates also undersells how much height alone controls outcomes. Readers fixate on fuel type or marinades when a four-inch adjustment in grate height often does more to fix a scorched dinner than any ingredient swap. If there’s one habit worth building before anything else, it’s testing distance and coal readiness on cheap, forgiving food, like vegetables or sausages, before you risk an expensive steak on your first attempt.
Where most articles also fall short is treating gloves and tools as an afterthought. Standard oven mitts genuinely aren’t built for the radiant heat a fire pit throws off, and that’s not a detail to skip past. Sort your kit properly first, and the recipes take care of themselves.
— Peter
Get your fire-pit cooking starter kit sorted
The categories covered in this guide, from adjustable grates and cast-iron cookware to heavy-duty gloves and coal tools, can be found conveniently together rather than spread across many shops.

Buying your starter kit together means one delivery instead of several, and orders over £70 qualify for free delivery, with next-day options for anyone who wants to be cooking by the weekend. Whether you’re replacing a flimsy grate or building your first proper setup, browse the fire pit and outdoor cooking range at Great Gardens Online and get your kit sorted before the coals are even lit.
Sources
- How to Cook Over a Fire Pit | Field Company
- Fire-pit recipes: how to start a backyard blaze safely, and what to cook on it | The Guardian
Always check your local fire service’s guidance before lighting a fire pit, since rules on clearances and permitted fuel can vary by area.
FAQ
Can you cook food on a fire pit?
Yes. Once the fire has burned down to a steady coal bed, a fire pit cooks food just as reliably as a barbecue, whether you’re grilling directly over the coals or roasting in a Dutch oven.
How do I build a fire pit for cooking?
Choose a bowl-style or in-ground pit that can hold a grate or tripod, set it on a non-combustible surface with a clear perimeter, and position your grate roughly 4 to 6 inches above the coals once it’s lit.
What is the best fire pit for cooking on?
Bowl-style pits tend to suit most home cooks best, since they accept a flat grate or tripod without modification, while in-ground rings give a wider coal bed better suited to Dutch oven cooking and slow roasts.
How long should I wait before cooking on a fire pit?
Let the wood burn down for about 40 to 60 minutes until flames die away and you’re left with a steady bed of glowing coals rather than active fire.
What tools do I actually need for fire-pit cooking?
An adjustable grate or tripod, cast-iron skillet and Dutch oven, long-handled tongs and a spatula, and heavy-duty gloves rated for radiant heat cover almost every fire-pit dish, and these are commonly found in specialized retailers for those building a starter kit.
